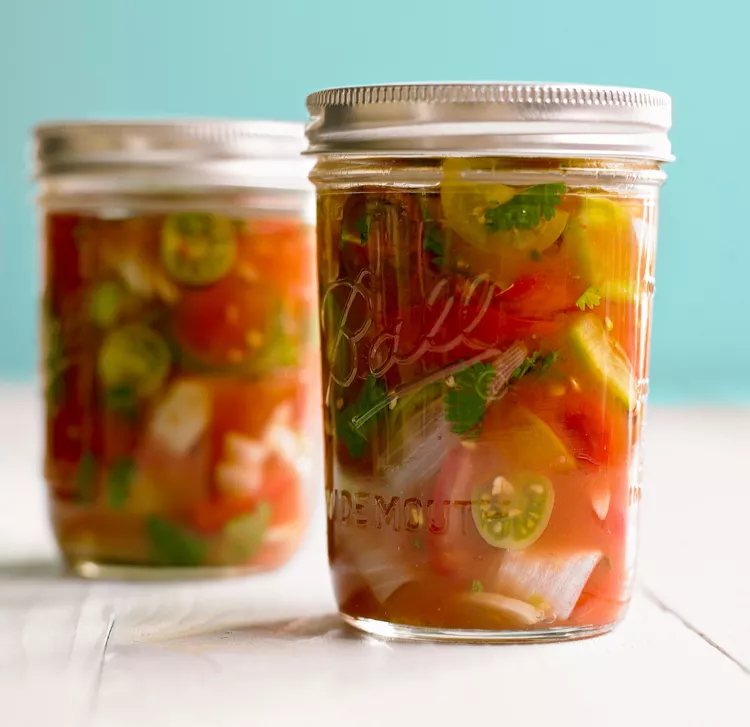
When it comes to summer gardening, we'd happily turn our entire tomato harvest into zesty, zippy salsa to save it for later in the year. If you also end up craving homemade salsa long after summer is over, canning is for you. Learn how to can salsa so not a single garden-fresh tomato goes to waste. Learning how to make canned salsa at a high altitude? Not to worry. We've included adjustments depending on how high above sea level you are. So grab your tomatoes, jars, and a bag (or two) of tortilla chips and get ready to learn our Test Kitchen's must-know tips for canning salsa.
How to Can Salsa
All tomato-based salsas will be acidic, but recipes need to be formulated to ensure the acidity is at the right level for safe canning. Before you get started, make sure you're using a salsa recipe created for canning. If you try to preserve a salsa recipe that isn't intended for canning, it may not keep and therefore be unsafe to eat.
:strip_icc():focal(621x728:623x730):format(webp)/metal-wire-device-canning-pot-5ge5qfwdqXoAj0qFOLS8Tg-ce89da8f22ad49d898596f4c9c203783.jpg)
:strip_icc():focal(758x596:760x598):format(webp)/jars-lids-screw-bands-for-canning-4mweMLcYqiSAdFJDDVWK6a-364e8a471c0c41f08e05b3f51914f3a0.jpg)
:strip_icc():focal(818x645:820x647):format(webp)/canning-equipment-on-wooden-surface-5HUU-MhwK4BAXCXh38jONO-d6e1a43ba18f4bb98fd609a6a28a4fd5.jpg)
Step 1: Setting Up
To get started, you'll need some basic canning supplies, including:
- Boiling-water canner pot
- Jar lifter for pulling jars from boiling water
- Canning jars, lids, and metal screw bands
- Magnetic lid wand for lifting sterilized lids from the boiling water
- A nonmetallic spatula for pressing bubbles out of jars
- Ruler to measure headspace
- Funnel to direct hot liquids into jars
These items can be found with canning supplies in most grocery stores, supercenters, and many hardware stores.
:strip_icc():focal(587x789:589x791):format(webp)/slicing-roma-tomatoes-with-paring-knife-67ada694-cfc44f53da0a44298538469812d942d2.jpg)
:strip_icc():focal(532x673:534x675):format(webp)/removing-skinned-tomatoes-from-boiling-water-3b5bc7d2-99c840d7d07a45378010be45eb9eeb33.jpg)
:strip_icc():focal(621x621:623x623):format(webp)/peeling-skin-roma-tomatoes-after-cooking-5f440a9c-0e6a1e71487c47ce8bd8047cabb35238.jpg)
Step 2: Prepping the Tomatoes
Because tomato skins can add an undesirable texture to your salsa, most recipes recommend peeling tomatoes before chopping (just like when you're freezing tomatoes). This is an easy four-part process.
- Use a sharp paring knife to cut a shallow X in the bottom of each tomato. This is where you will begin peeling once the skins split.
- Bring a pot of water to boiling. Use a slotted spoon to immerse tomatoes in the water. (Tomatoes should be covered by water.) Let cook 30 to 60 seconds or until tomato skins begin to split. Using a slotted spoon, transfer tomatoes to a large bowl of ice water to chill them quickly.
- When tomatoes are cool enough to handle, use your fingers or a paring knife to peel the skin off tomatoes. Discard the skins. Use a paring knife to core the stem ends.
- Cut each tomato into quarters. Use a spoon or your fingers to scoop the seeds from each quarter. Chop and cook tomatoes and other ingredients as directed in your recipe.
:strip_icc():focal(683x969:685x971):format(webp)/simmering-water-canning-jars-ab64df41-12dbe122a46247bc9528f71425ed4ce9.jpg)
:strip_icc():focal(608x633:610x635):format(webp)/boiling-water-poured-on-canning-lids-49dc7b5b-78f08297353f4d9ba2909a238a799111.jpg)
Step 3: Sterilize Your Jars
Safety is key when canning salsa. Starting with clean and sterilized jars is your first line of defense. Follow these steps for sterilizing canning jars.
- Thoroughly wash your canning jars, lids, funnel, and other equipment in hot soapy water; rinse thoroughly. Place jars in the boiling water canner or a separate large pot; cover jars with hot water. Bring to a simmer over medium heat. Boil the jars for 10 minutes; reduce heat and keep them in the simmering water until needed. Set screw bands aside. Place lids in a separate saucepan. Cover with water; bring to a simmer over medium heat (do not boil).
- If using a separate pot for sterilizing the jars, fill the boiling-water canner half full of water; bring to boiling. Heat additional water in another large pot (to top off water in the canner, if too much evaporates); keep it hot but not boiling. Place the canning rack in the boiling-water canner.
- Remove sterilized jars from the hot water; place hot jars on cloth towels to prevent them from slipping during packing.
:strip_icc():focal(670x679:672x681):format(webp)/ladling-salsa-into-canning-jar-funnel-DXrmBWwFaEz8sE7X3amyFJ-130bd04985c7416b8690188016567a5b.jpg)
:strip_icc():focal(579x758:581x760):format(webp)/removing-bubbles-from-jar-CkMeinK-aSJAY4Hf2EBgGj-0a270a9cfd734a7486973021e55ad8cb.jpg)
:strip_icc():focal(795x861:797x863):format(webp)/measuring-headspace-on-salsa-jar-1OC_I_Rvqlo9RPRCcxymei-2a699575c40747a7a82008390d04c8bb.jpg)
Step 4: Pack Your Jars
In a nutshell, to fill jars with salsa you just pour and go, but for the safest and easiest way to fill your jars use the tools and tips below.
- Pack hot salsa into jars using a sterilized wide-mouth funnel, allowing for adequate headspace—check your recipe for specifications. (Headspace is the amount of space you must leave at the top of your jar to allow for food to expand when heated.)
- Release trapped air bubbles by gently working a sterilized nonmetallic utensil or spatula (such as the one provided in a canning kit) down the jar sides. If necessary, spoon in additional salsa to maintain necessary headspace.
:strip_icc():focal(596x614:598x616):format(webp)/salsa-canning-jar-9d748a9d-726e6ed7d50f41ea87b5c46078a37383.jpg)
:strip_icc():focal(505x575:507x577):format(webp)/processing-jars-boiling-water-canner-6192fb8d-4faee543614c4fc086327a3e09a26888.jpg)
:strip_icc():focal(633x811:635x813):format(webp)/removing-jar-from-canner-Fme68r2qarbBnvAaEWyz5V-84ca60b34e69466bbbd4aed47c328d51.jpg)
Step 5: Process the Jars
The final step in canning salsa is to let your boiling-water canner do its work. Follow your specific recipe's processing time.
- Wipe jar rims with a clean, damp cloth. Food or liquid left on the jars' rims will prevent a perfect seal. Place prepared lids on jars; add screw bands and tighten according to manufacturer's directions.
- As each jar is filled and sealed, place it into the rack in the canner. Jars should not touch one another. Replace canner cover after adding each jar.
- When all the jars have been added, ladle hot water from the extra pot into the canner to cover jars by 1 inch.
- Cover; heat to a full rolling boil. Begin processing time following your recipe's procedures and timings exactly. Keep water boiling gently during processing, adding additional boiling water if level drops. If water stops boiling when you add the hot water, stop timing, turn up heat, and wait for a full boil before resuming timing.
- Use a jar lifter to remove the jars from the boiling water. Place the hot jars on a rack or on towels in a draft-free area to cool. Leave at least 1 inch of space between jars to allow air to circulate.
- After jars are completely cooled (12 to 24 hours), press the center of each lid to check the seal. If the dip in the lid holds, the jar is sealed. If the lid bounces up and down, the jar isn't sealed. Check unsealed jar for flaws. Contents can be refrigerated and used within 2 to 3 days, frozen, or reprocessed within 24 hours. To reprocess, use a clean, sterilized jar and a new sterilized lid; process for the full length of time specified. Label those jars for first use. If jars have lost liquid but are still sealed, the contents are safe. However, any food not covered by liquid will discolor, so use these jars first.
- Wipe jars and lids. Remove, wash, and dry screw bands; store for future use. Label jars with contents and date; include a batch number if you can more than a load in one day (so if a jar spoils, you can identify others from the same batch). Store jars in a cool (50°F to 70°F), dry, dark place.
How Long Does Canned Salsa Last?
Canned salsa sealed in a water bath can be kept and used within 1 year. Opened jars should be refrigerated and consumed in 2 to 3 days.
How to Can Salsa in High Altitudes
These timings are for altitudes up to 1,000 feet above sea level. Water boils at lower temperatures at higher altitudes, so you'll need to consider a few adjustments.
Sterilizing jars: Boil jars an additional 1 minute for each additional 1,000 feet.
Boiling-water canning: The following times work as guidelines, but call your county extension service or visit its website for detailed instructions on canning in your area.
- At 1,001 to 3,000 feet above sea level, increase processing time by 5 minutes.
- At 3,001 to 6,000 feet above sea level, increase processing time by 10 minutes.
- At 6,001 to 8,000 feet above sea level, increase processing time by 15 minutes.
- At 8,001 to 10,000 feet above sea level, increase processing time by 20 minutes.
Pressure-Canning Salsa
Pressure canning is meant for low-acid foods, those with a pH of 4.6 or higher; water-bath canning is used for higher-acid foods, with a pH lower than 4.6. Fresh tomatoes can fall range between 4.3 and 4.9 on the pH scale depending on their ripeness. Most salsa recipes are processed in a water-bath canner, usually with some lemon juice added to increase the acidity. If you want to use a pressure canner instead, make sure you find a specific pressure canning salsa recipe. You should never try to make a water-bath canning recipe in your pressure canner because the processing times will be different and your salsa might end up turning to mush due to the pressure canner's higher temperature.
